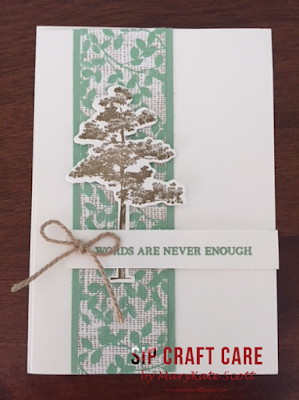
The 2 notecards are 7 x 5 ½ and come
pre-cut and scored
Designer paper is 1 ¼ x 5 and the solid layer is 1 ½ 5
The sentiment is on a ½ strip
I used the matching sahara sand twine
You’ll need a scrap to stamp your tree. I love the dies that match to make tree
cutting quick and easy. I think I prefer the vertical card but I think both work.
Notecard Holder
The holder is a 12 x 12 piece. If you paper is directional, ensure the pattern faces “north”
along the top of your scoreboard. Score at 2, 5 ¾, 5 6 ¼, 10
Turn and score on the other side 2 ½ and 8 ¼ (yes this is not symmetrical – stay
tuned!) Burnish all folds. You'll I forgot to take photos along the way, but it was easy to undo and then refold!
With your paper facing “north” fold in the 2 triangles 2” to meet the 2” score line.
Now fold on the long 2” line – do on both sides.
Turn the folder and fold in each half – making sure you have the ½” in the middle so your cards fit.
Now fold the bottom into the top – because the just fit with a small
overlap.
Decorate the front, I used the
tree on the stitched shape and then put the grapefruit grove twine around, then
put the tree on top with dimensionals. Di
Barnes of Australia invented this pouch and I changed a few measurements to
make it fit.
I like that the pouch has 4 openings – so
the cards in the middle, put on either
side there is space for a note, or I put in an envelope of greetings, trees, embellishments and I’m going to add 2 blank cards and my niece can make up her own cards.
Will you make one? So many pretty papers to choose from!
Tomorrow I'll post a zee fold card with this same set, love these trees!
Happy stamping, MaryKate


No comments:
Post a Comment