Hello all... I have a fun class for you. I'll be live June 27 6pm ET - email me for a link MaryKate@MaryKateScott.com and you can cut your own class if you wish.
I host online classes every Tuesday 6-730pm ET and you can join live with Zoom or catch the replay on our private group. You can simply watch, you can get the tutorial and make your own packet, or you can buy a packet with all the pieces cut and prepped (with or without the stamp set.
This class comes right after our Layering Leaves and right before Circle Sayings -- but you'll find almost any stamp set will work.
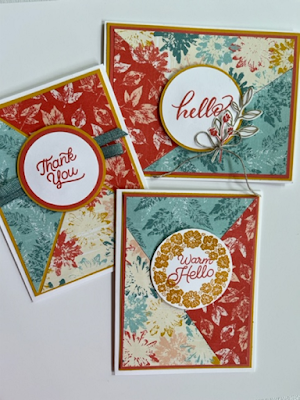
The photos below show the new Inked Botanicals and I've used matching colors: Calypso Coral, Crushed Curry and Lost Lagoon - but after class Tuesday June 27 I'll post new creations using the Countryside Inn paper with Boho Blue.
Here are my 3 cards
Here's your supply list
Cardstock
– cut 2 pieces of 2 coordinating colors 4 ¼ x 5
½ (1/4 sheet of cardstock)
DSP 6x6 3 sheets, we will cut this to 5 x
3 3 /4 – we’ll cut this into 3 pieces during class, and we'll use the left over pieces as well.
Ribbon
and Embellishment to match if you wish
Packets
include a large “envelope” to hold your cards and envelopes
These
are the 3 cards I made using my pieces.
You can
make them horizontal or vertical.
Step 1
cut the designer paper to 5 x 3 3/4 - create 3 triangles.
Step 2
shuffle the pieces of designer paper
Step 3
create your layers with cardstock.
Step 4
create greetings
Step 5
add ribbon or embellishment.
The
thank you card has ribbon, the warm hello has just stamping, the hello has the
bough with flowers and twine.
For the
layers, I did several different options.
The
hello has Coral 5 ¼ x 4 and Curry 5 3/8 x 4 1/8
The
thank you has just Curry 5 ¼ x 4 and you’ll see I placed the designer paper
apart so the curry shows through.
The
warm-hello has Coral 5 ¼ x 4 and Curry 5 3/8 x 4 1/8
Step 6 you have left over pieces, 3 larger, 3
smaller
You
can decorate your envelopes. See photos
for options.
Step
7 And then create a tag for your bag. I used the new In Color bags and added a tag.
Please join us, we are a fun, chill, happy group of crafters, we love to share our creations and get ideas from each other, email me MaryKate@MaryKateScott.com and I'll connect you to our group.
Happy stamping - MaryKate
#CircleSayings
#LayeringLeaves
#CutandShuffle


 Simply put the 2 sprays on the back of the greeting. Love the stitching around the dies. These stitched shapes are part of the die set.
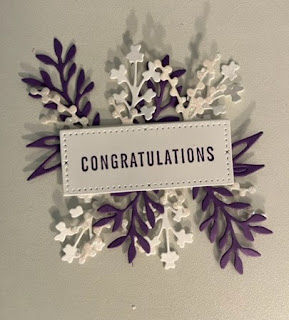


