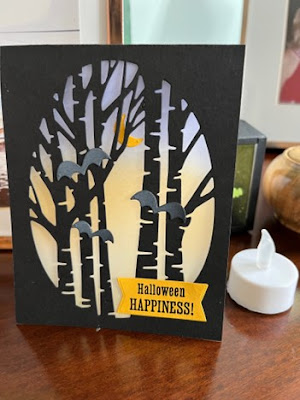
Using the Aspen dies for Halloween projects -- creating projects that light up!
I have 3 projects for you today for Halloween, all super easy and quick, and some with some cool coloring techniques.
The bag is very simple, but I have a useful tip for you before you die cut! You can find the bags on Amazon or Walmart (search orange paper lunch bags), they are about 5 x 8"
If you die cut the bag while flat, you'll have a slight overlap on to the bag. While this doesn't show from the front, you are taking away paper and making the bag is bit more flimsy (or as Charlie says... comprimising the structural integrity of the bag - hey he builds big stuff including bridges!). See bag above on the left without folding, on the right it's folded so the back won't cut out.
 Instead fold the bag at the bottom, so the bottom folds up, then die cut - see the photo.
Add candy, shred, and little fairy lights (Amazon search "fairy lights"), about 12 for $10.
The black card base is 4 1/4 x 11, white it 4 x 10 1/2 folded in half. The vellum is 4 x 5 1/4
Tip with the blending brush (or sponger or dauber), tap on the ink and then "take off the color" on a scrap (or your grid paper) and then apply to the vellum in a swirling motion. This creates a softer look. If you don't "take the color off" you'll get big blotches!!
I added the vellum to the inside of the card, and then you can use this as decor with a tea light between the first layer of white and the vellum, here it is lit up (bit hard to see in the daylight!)
The final card project uses the darkest of the silver foils for the front of the card (popped up on dimensions) and then I added bats and the googly eyes. Tip: on the black base below the silver foil, I used white craft ink, swirled on lightly to give the woods a spooky look. You can also use the white pencil that is part of the watercolor pencils. Card is 4 1/4 x 11 folded.
All the greetings were from the stamp set Scary Cute (but many Halloween sets work).
Here's a link to purchase the Aspen dies
I'll be posting more Halloween projects later this month
Questions? Don't hesitate to reach out to MaryKate@MaryKateScott.com
Happy Halloween!
MaryKate
#Halloween
#StampinUp
#AspenTreeDies
#Aspen
#LightUpProjects


No comments:
Post a Comment