Wednesday, November 30, 2022

Seaside By the Bay a new set coming in January and How to create a sampler

Hello all... my team and I are creating 12 x 12 samplers using the Seaside set - it's a new set with dies and matching paper, embellishments, ribbon and more.

To make a 12 x 12 sampler, we have a host that makes a 6 1/4 x 3 design to set the tone, and then each swapper makes a 3x3.  Terry Dell'Amico is our host and her piece arrived today - stunning.


Here's my 3x3.  I wanted to showcase the designer paper and I love the gold foil. So I added a 2 7/8 square of gold to the 3x3 of Balmy Blue and then created my scene.  

The little sandpiper birds remind me of our beach here on Anna Maria.


Here are my tips on putting together a swap.

First -- make up 1 piece entirely - and make sure you are happy and then, and only then create the next 7 pieces!

I then cut the bases (Balmy 3x3), Gold 2 7/8 x 2 7/8, and then stamped the beach. I love the die that gives me that rough "beach/sand" edge.  Then I stamped and die cut the 3 different birds - it's one stamp to stamp all 3 and one die to die cut all 3.  Then I die cut the sun and the 2 shells.  Here they are, all finished, mostly the same but a bit different.


The paper was a fun challenge. We can only use navy, coastal, balmy and gold, along with crumb cake, so I had to make sure the pink didn't show.

I cut the DSP into 3x3, and then trimmed each piece separately to 2 3/4 x 2 3/4. Below is the whole sheet 6x6 cut into quarters


Above you can see how I trimmed each piece. 

When I get all the pieces I'll put it into a frame and show you the whole look!

Super fun swap sampler to be part of. Join our team and have all the fun with no obligations.  Our holiday party is next Monday (we have one every 3 months, online, so everyone can join in with crafting fun, projects, games, and a bit of silliness!) email me with thoughts or questions MaryKate@MaryKateScott.com

My online store is open and tomorrow Dec 1 there is a clearance refresh, head to the online store early! Don't forget the host code and a present will arrive in the mail to you!


Happy stamping, MaryKate


Monday, November 7, 2022

IDEAS Blog Hop Giving Thanks A book binding explosion card

Hello and welcome to the IDEAS Blog Hop for November 2022 - featuring projects for "giving thanks".


Welcome to our IDEAS blog hop for November 2022. Our theme is Giving Thanks.  We have a range of projects from easy and fun for new stampers or more detailed designs for an avid craftr.  

This month we have curated tutorials from 13 international Demonstrators with a 50+ page full color tutorial bundle for you, featuring colorful cards and 3D projects.  You will get 13 detailed tutorials with a range of projects including 13+ cards and 13 3D projects.  The tutorials have detailed instructions in imperial (aka inches!) and metric.


Here is our sneak peek collage for the November IDEAS Tutorial Bundle.  Each photo represents one designer's tutorial in our bundle.

I used the "A Million Thanks Kit", I love this kit, it is elegant and so easy to put together. For this card I used the stamp set from the kit, the ink from the kit and used "Awash in Beauty" designer paper.

The card is a "book binding card" with an "explosion" on the inside.


All the details, how-to, dimensions and tips are in my tutorial. Lots of photos and diagrams to make it easy to follow along.    A super fun project!  Make it a class by adding in the kit and making up kit cards. 

I hope you like these projects and the projects from my fellow IDEAS demonstrators.  It's really a great bundle of inspiration for crafters or demonstrators looking for new ideas or workshop ideas.  Keep hopping so you can see all the creativity.   The bundle is about 50 pages of detailed full color instructions with 30+ projects.

Would you like a copy of the instructions for these projects to use for your personal use, or even to use in your classes? Contact me at MaryKate@MaryKateScott.com Free to customers, or Free to my team members, or $15 by PayPal.  

Once you have received the tutorials, please remember not to share or distribute the printed or electronic copies of these bundles. We have worked hard to provide these exclusive projects for your use. If you know someone that would like to purchase the bundle, please direct them to me to obtain their copy. Thanks for your support.

Thanks for stopping by. Please click on NEXT and visit Dara in Canada, she's the next talented IDEAS demonstrator.

Happy Hopping! MaryKate


Monday, October 31, 2022

Happy Halloween all - Have a Bewitching Halloween!

My friend Diana made this super cute Halloween card. Can you see that the boots move?  


She used a tiny attachment - a brad - to the top of the boots to create movement. So fun!  


This bundle is sold out, we had a ton of fun with it during our September Online Series, Tuesdays 6-730pm 3 projects, each week for 3 weeks. Next month we are doing the Paper Pumpkin Ho Ho Ho (so sorry kits are sold out). Stay tuned for the December classes, with sign up by November 15.  We are live 6-730pm and it's recorded in case you miss it!


Have a great Halloween!  MaryKate

Wednesday, October 26, 2022

Paper Pumpkin Ho Ho Ho Projects

Wow this month's Paper Pumpkin is a winner! 9 fun Christmas cards.  Our group of fun crafters chose this kit and stamp set for our Tuesday Online Series.  I created 9 extra projects using the stamps, and we'll create 3 projects each Tuesday Nov 1, 8, 15. 


Here are a few of the 9 projects I created: this first card opens to hold a gift card (sorry about the odd pink lighting on the 2nd photo!)


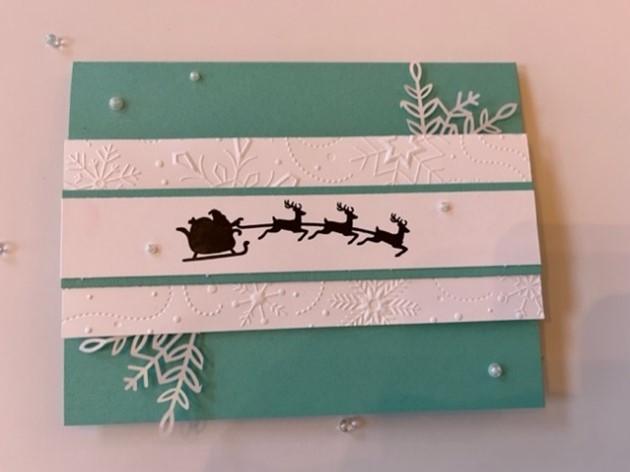
The stamp set includes Santa and the reindeer, love it!


And these "north pole sacks" are fun for treat bags and great as card bases.


Here is a 3 min video showing you this kit and the stamp set (and all the inclusions.  


The refills are available Click here to see the refill

And these treat bags are too. Click here to check out the "north pole sacks"


Feel free to join us. You will need the PP kit. My kits are sold out but you can follow along the tutorial and cut your own kit, just reach out to MaryKate@MaryKateScott.com


We will select our set for Dec next Tuesday, stay tuned. If you'd like the kit and tutorial it is $20 pickup or $30 delivered for 2 classes (less time in December with the holidays).    


Not a Paper Pumpkin subscriber? You can buy a single month, just 3 months, you can subscribe and hit pause anytime... it's a super fun all-inclusive crafting kit.  Click here for Paper Pumpkin details


Let me know if you are interested in Tuesdays 6-730pm online or if you have questions! 

Happy Stamping MaryKate

Monday, October 24, 2022

Make the Cover of the Stampin Up J-D Mini Catalog with Lights Aglow

 I love making the cover of the catalog - our designers really know how to make a card pop!

They also have to design for different markets with different card sizes, so I needed to make small adjustments.  Here's my card and recipe. 


1.The Cover Card with Lights Aglow


Vanilla Base 5 ½ x 8 ¼

DSP (front) 5 ½ x 4 ¼ die cut with the deckled frame

Below the frame 5 ½ x 3 (vanilla/gold background)

Gold sparkle paper 1 x 5 ½

Tree #1 Soft Succulent: stamp and die cut

Tree #2 Evening Evergreen: die cut; Gold glitter paper: die cut

Tree #3 DSP in Soft Succulent

Ribbon about 15”

Vanilla Die cut

Inside 5 ¼ x 4 Vanilla

Glimmer paper for stars on top of the tree

DSP 2 ½ x 6 for vanilla envelope decor


The bow is a double bow (to match the cover) so you simply tie it twice.


I hope you liked my version and found the recipe easy to follow!


Happy stamping, MaryKate

#LightsAglow

Tuesday, October 18, 2022

Quick update - Clearance Refreshed Today

Hi all... just a quick post... the clearance rack was just refreshed, lots of designer paper, specialty paper, embellishments, ribbon.

Click here to see all that is in Clearance

And here's an image with just a few of the many items on sale!


Don't forget the host code so you can get free stuff of your choice, I'll reach out and ask you what you'd like (amount based on your order!), host code is top right of this blog, and here is the current code 4NQCDKCS

Questions? MaryKate@MaryKateScott.com


An easy fold up Star Ornament and Celebrate with Tags bundle

We learned how to create this star ornament at a Stampin Up Convention years ago! Orginally made with 12 x 12 paper the star was wow and huge!  

Today I'm creating it to finish much smaller - about 4" from tip to tip, perfect for your tree.

I'll also share a few other easy projects - these will be part of our November Online series (Tuesdays 6-730pm online live and recorded).  We will use the October Paper Pumpkin for that series.  


First the star ornament

Cut a 4 x 4 square

Fold in half, fold in half again and fold “tip to tip”

Measure 3/4” from each edge (your cutting line)

Cut these 3/4” - can you see the 4 lines below? cut here. 


Fold into the triangles into the center (last photo)

Use a glue dot and bring the triangle edges together

Make 2 stars and then adhere these to stars together (I found glue dots easier than the liquid glue)

With a darning needle add some twine, ribbon or metallic thread and hang on your tree. 


The gift card holder (it's a slider) and the tag were made with this super bundle.  It's right at the back of the catalog and I think it's getting missed! The mittens are so cute.  It's in the online store (see the cart), search "celebrate with tags".


If you have questions, would like info on our Tuesday night series, or these projects, you can reach me on MaryKate@MaryKateScott.com 

happy crafting, MaryKate