Tuesday, September 29, 2020

Double Triangle Cards in Warm Hugs Paper

 I have a fun double-triangle card for you - perfect if you have some smaller pieces of patterned paper!


You can find a video here with how-to's and tips and ideas on stamp sets that work well with the design.


Click here to see the 5 min video


Dimensions:

Real Red cardstock (back) 1/4 sheet of cardstock 4 1/4 x 5 1/2

Whisper White 4 x 5 1/4

Designer paper triangles are 3 x 4" folded into a triangle, the 1" flap is secured to the back of the Whisper White cardstock.

The front panel can be any nested dies (larger is better), I used dies from Hippo Happiness.


Tip: I like to stamp a little texture on the top and bottom of the white card to remind me not to write too big a greeting!


Don't forget that our designer paper sale starts Oct 1st right here in my online store, many patterned paper packs are 15% off!


Thank you for shopping with me, I appreciate you and love sending you thank you gifts for your order!


Happy stamping, MaryKate


Wednesday, September 23, 2020

A really big gift bag with Warm Hugs designer paper

My amazing team leader Suzie Barnes designed this "Big Bag".  I love it!  


It finished at 7 1/2" high and has a depth of 3", so it holds a lot.

Ingredients: 2 sheets Mossy Meadow 8 ½ x 9 ½ scored (on the 8 ½ at 5 and 8) and (on the 9 ½ at 7), 24” of ribbon, 12” of gold cord, DSP 2x5”


Burnish score lines with a bone folder.  Trim the tabs at the bottom of the bag. Attach the 2 pieces together on the 9 1/2 side so you end up with a long 16 1/2 piece (by 9 1/2).  Now attach the other side to make a box. Close the bottom.  


Adhesive, I suggest tear n tape or the new Seal+ both are strong adhesives.


Decorate your bag by first attaching your DSP (designer series paper) and then punching holes for the ribbon.  I used the matching Mossy Meadow ribbon. Attach a tag. 


I hope you make one!  I know you have cardstock and pretty paper and ribbon in your stash.  So it's a fun easy and practical!  And if you anything, my online store is a click away (just click on the cart), fun customer rewards this month :)


Thanks Suzie for all you do for our team. We have a coast-coast team and are so lucky to get great support and training. If you'd like to join us, please reach out and I can answer any questions - and gives you the chance to get to know me and the team.  There's a good offer now, as the starter kit (choose $125, pay $99) also includes 2 kits (2 stamp sets and 16 kit cards) for September 2020. If you love kits, like Paper Pumpkin, or love getting a 20% discount on all your SU crafting supplies, this is for you.  


You can reach me on MaryKate@MaryKateScott.com


Happy crafting, MaryKate


Tuesday, September 22, 2020

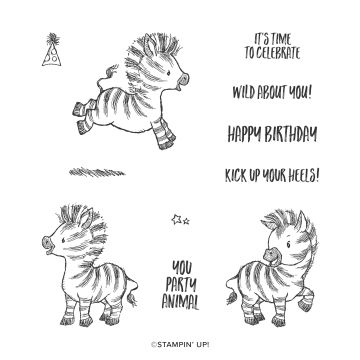
Zany Wobbling Zebras

 The Zebra set is in our Beginner catalog so it's a bit hard to find. It's so cute, perfect if you love to color, or not.  I kept my card black and white.  


Can you see the wobble under the Zebra above?  

What is most fun about this card is the "wobble", this is a small plastic gadget (you can get them anywhere, e.g., Amazon), you search 

Hampton Art AWSM048 Action Mini Wobble Spring, they are about 30c each and they make the image wobble.


The wobble is underneath the zebra on the left, so it is really kicking up its heels!   This card was designed by Betsy Lang, so fun. Thank you Betsy.

The inside has another zebra and a "wild about you" greeting.  

ZANY ZEBRAS CLING STAMP SET

Front dimensions:  4 squares in order 3 1/2, 3 1/4, 2 3/4, 2 5/8 (white).  The smaller squares in each corner finish as 1 3/4 square.  

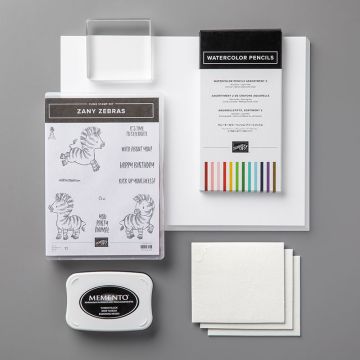
Will you color yours or leave it black and white!?  And if you are looking for the bundle of products here they are at $59 - this would be a fun gift!

ZANY ZEBRAS PROJECT COLLECTION

happy stamping MaryKate

Monday, September 21, 2020

Stamp Sale coming... Sept 23...15% off select stamps

We just got word a stamp sale is coming on Sept 23! 15% of select stamp sets.  I have the list and will send it out later today by email. It's only 24 hours!


Lots of fun sets to play with on this list!  

Happy Shopping, 

MaryKate

Poinsettia Autumn Card holder

This card holder can easily hold 4 full size cards and 4 envelopes.  When selecting paper for this project, find heavier weight designer paper or use cardstock. I used Thick Very Vanilla and Poinsettia paper. I used vanilla ribbon from the annual catalog.


Card Holder instructions

To make the card holder, cut the cardstock 8 ½ x 10 and on the 10” side score at 4 3/4, and 5 ¼. 

One the 8 ½ side score at 2 ¼ and 2 ½.    

With the 1” piece left over, make the “gusset” pieces: cut 2 pieces 1 x 2 ¾ and score each at 1, and 1 1/4.  

Trim your holder removing the middle piece measuring 1/2 x 2 1/2 and burnish your folds.

Add the 2 gussets, first to the bottom and then attach to the folder (so they won’t show). 

Decorate the front with designer paper 4 ¼ x 5 ½. If you wish, wrap about 24” of ribbon around the front and tie in a bow.  Put your dimensionals at the top and the bottom of the square so the ribbon runs freely.

Inside the designer paper is 4 ¼ x 1 ¾ on each side if you wish.

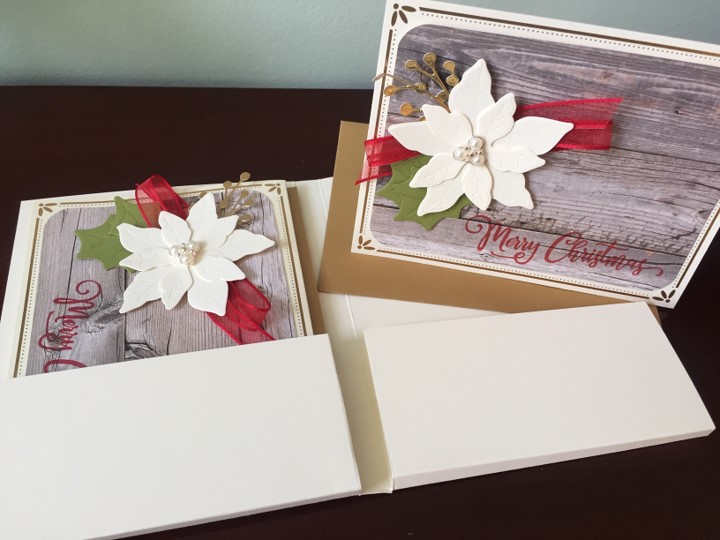
Here are the cards


I used the gold card bases and added die cuts from the Poinsettia dies in vanilla, the wood-look paper is also from this Poinsettia paper pack.  

The real-red sheer ribbon really adds to this card. The greeting is from the Buffet Tag set.  

I love the beaded gems that go in the center of the flower petals... so pretty!  

I hope you make the holder and these cards, they are pretty and so easy!

Happy stamping MaryKate

Friday, September 18, 2020

Easy way to make a diorama card with Trimming the Town

We have had fun making these diorama cards.  Perfect for holiday - you can easily insert a photo on the back wall.  


Here's a diorama card with just designer paper and a greeting from the Buffet Tag kit.  


click here for a short video with great tips to easily make this card


The paper is from "Trimming the Town" in the Stampin UP Holiday catalog (just click on the cart and you can browse).


This card looks hard, but I promise you my video shows you how to create this very easily.  It folds flat, goes into a regular envelope.  So fun.


I hope you try it!

Happy stamping MaryKate 


Happy anniversary to us!

Nothing crafty today.... just a personal share.

It's 10 years today ... I'm so lucky to be Mrs Charlie xo